The original kit was issued from 1955 to 1959 (when it was replaced by the Spitfire Mk.IX) and fetches high prices on eBay, so it is nice that a resin copy is now available to build. All the parts are there, except the stand and decals. The original kit came with a rectangle stand with later kits using the tear-drop stand which you can get from other old Airfix kits. Airfix issued a "50th Anniversary" BTK Spitfire in 2003 which used Airfix's Spitfire Mk.Ia kit with BTK decals. Research has shown that the 1953 date given in Arthur Ward's "Celebrating 50 Years of the Greatest Plastic Kits in the World" was early by two years.
The Kit
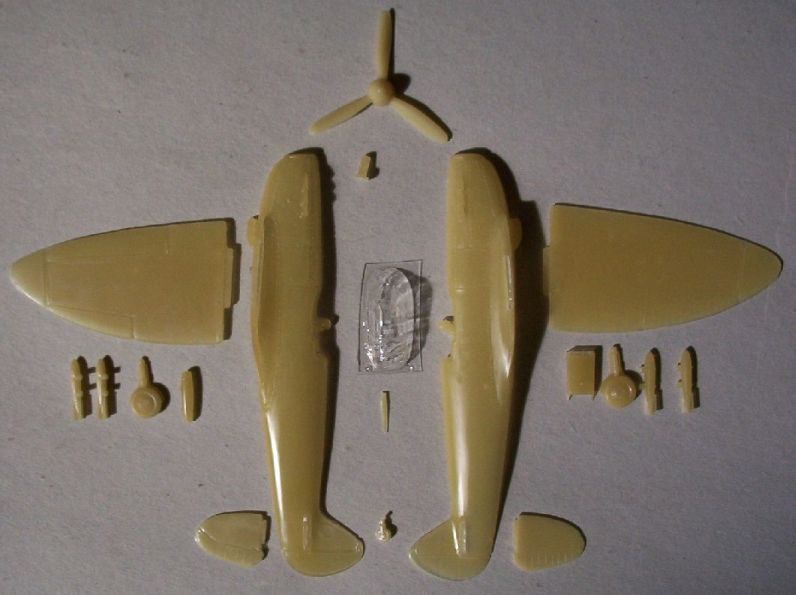
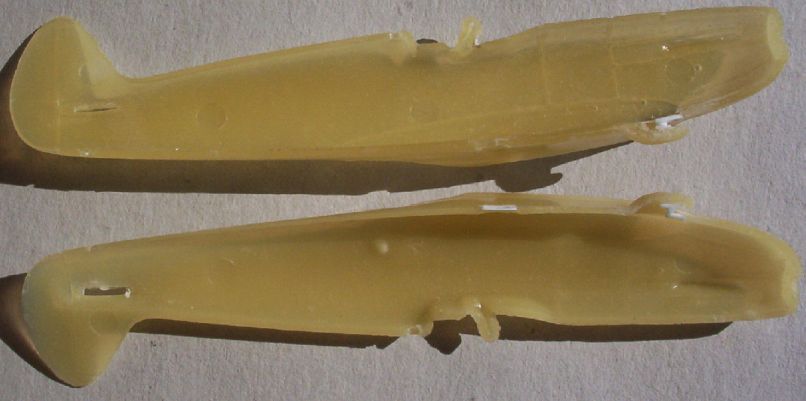
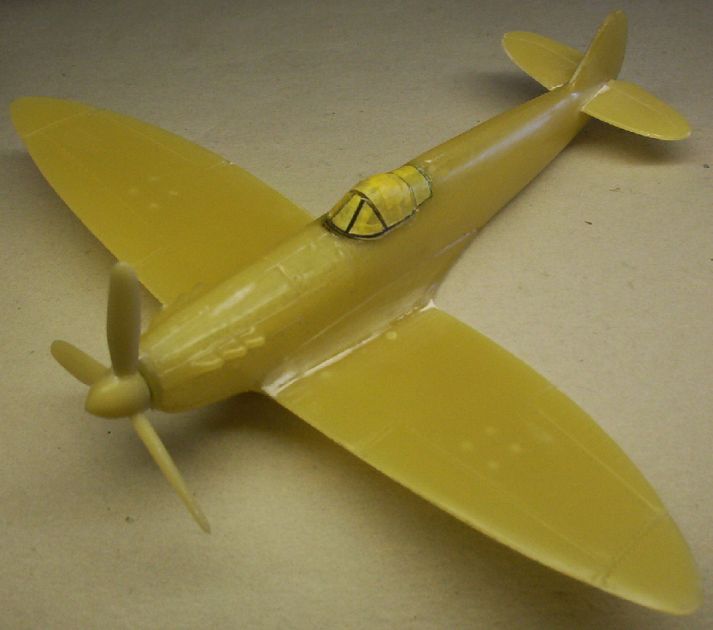
All the parts in the kit were packed in small plastic zip-lock bags which were then wrapped in bubble wrap. All the parts arrived undamaged from their voyage from England to Australia. The resin used in this kit is a slightly translucent yellow colour and is very well done. There are a handful of small bubbles that can be easily filled in. The canopy is provided as a vacform which is a lot better than the original moulded piece! The radiator was one solid piece, instead of being empty inside. John D. Jones has recast this part so that the inside is now hollow. This new part was sent to myself and others.
|
The parts were well packed. |
For decals, I used some of the anniversary kit decals, although the underwing decals are incorrect for a copy of the kit. They should be A1 type with yellow surrounds, instead of A type without the yellow surrounds. The decal scheme for the BT-K kit do not fit any known scheme indicating the poor research by Aurora, which Airfix copied.
I bought the kit from Airfix artist John D. Jones for £16.50 (including postage).
Construction
This was my second resin kit, which was a little more complicated than my first. This was also my first World War II fighter since building a Frog 1/72 Zero in the 1970's! There were no pour stubs to remove, which presumably had already been removed by Mr. Jones. After the fuselage halves were joined, the propeller spun very freely. Unfortunately, I believe I spun this too much, as the back of the pin of the propeller fatigued and eventually broke. I then glued the back of the pin inside the fuselage to stop it rattling around.
 |
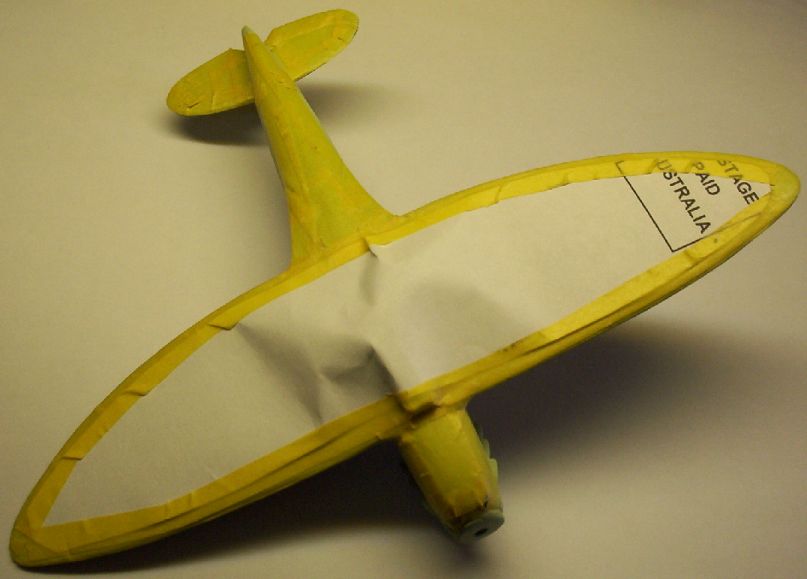
The stand slot was filled and the air intake partly rebuilt using plastic card. |
As the cockpit interior is sealed off, with only the head and shoulders of the pilot showing, there was not much to do in this area. However, I added a head rest stand using plastic card, a head rest and a voltage regulator (behind the head rest) using plastic rod. The stand was painted cockpit green (Humbrol H78), headrest brown leather H62, and voltage regulator satin black. The sealed cockpit was painted matt black. The pilot uniform was painted RAF blue H96, life jacket yellow, face flesh, and flying helmet brown H160.
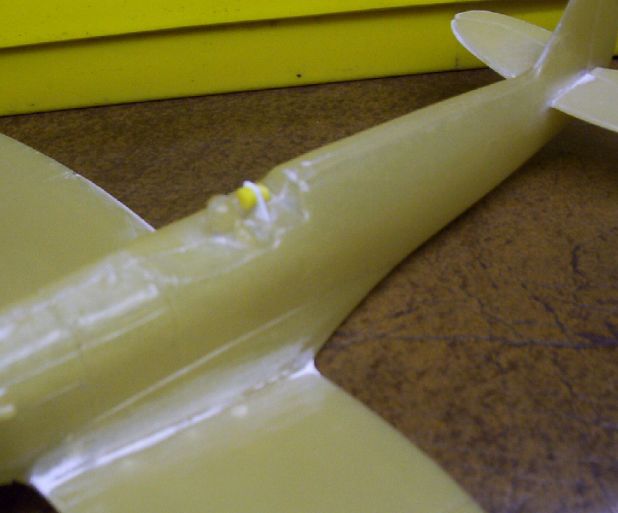 |
Scratchbuilt headstand. |
As there was only one canopy and this was my first vacform canopy I took great care and a lot of time to make sure I didn't damage it when cutting the excess plastic away. After gluing using Testor's clear drying cement, I was not happy as the back portion of the canopy was not level with the fuselage. I pulled off the canopy and did some more careful cutting until I got a satisfactory fit.
An unusual aspect of the BTK are that the wheels are moulded into the wings. As I like building aircraft wheels down (more parts to use that way :-), I scraped away the wheels in the wings. The depth though was very shallow, about 0.5 mm. I didn't want to go deeper as I might damage the wings.
A slight difficulty was getting the wings at their correct 7 degree dihedral angle. I had to do some sanding and scraping of the wing stubs and slots, with the resin getting very thin in some places near the wing root. With superglue though, I got a very strong bond of the wings to the fuselage. This was then followed with putty and a little sanding to get a smooth join.
For the elevators, there was a bit of a step at the fuselage. I carefully sanded away at the elevator join in order to get a smooth join.
Painting and Decals
The first step in painting was masking off the canopy using my trusty Tamiya masking tape. This was followed by three coats of undercoat H1. I always seem to find defects somewhere after spraying, which require sanding and then another coat! Most of these were very small pinholes I had previously missed. These were filled in with Testor's putty.
 |
Canopy masked up. |
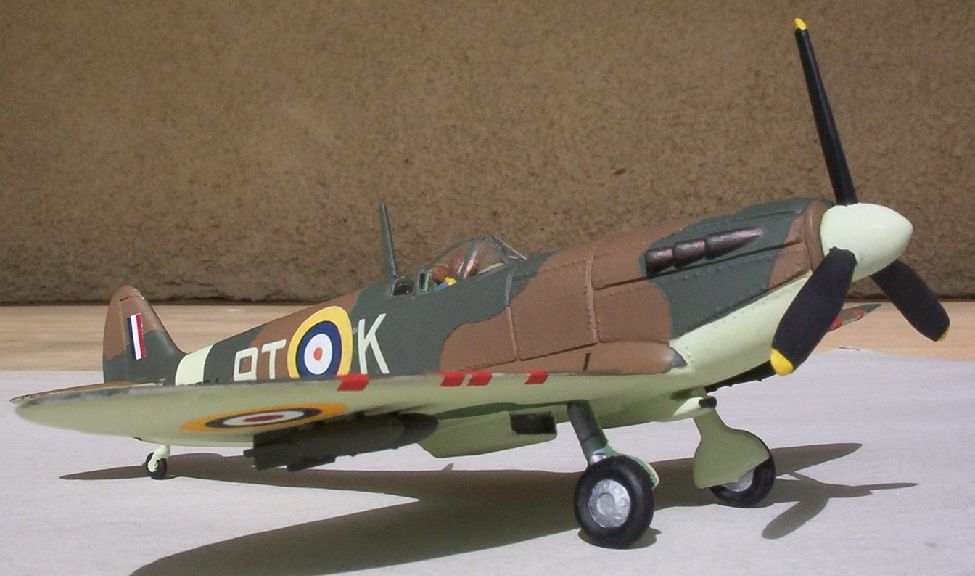
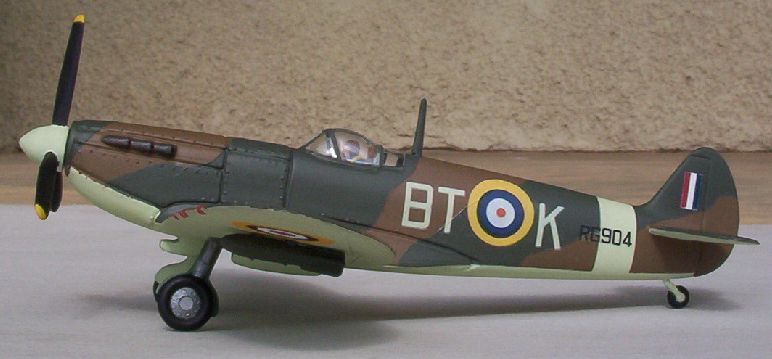
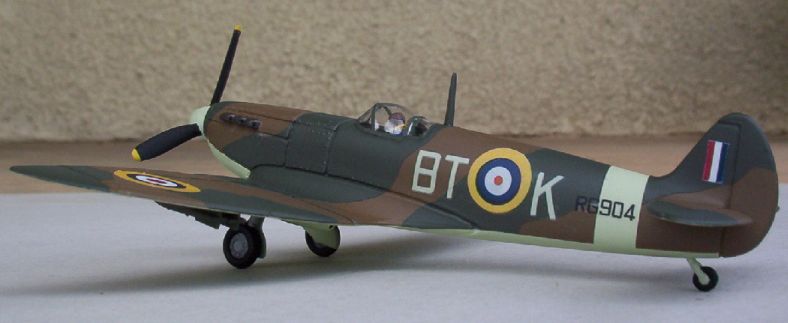
Most BTK Spitfires are usually painted in the 1940 Battle of Britain scheme with a Sky undersurface, Dark Earth and Dark Green upper camouflage and a black spinner. As my research possibly showed BTK to come from 92 Squadron in 1941, I decided to paint mine in a latter scheme which a Sky fuselage band and Sky spinner. Accordingly I sprayed three coats of matt beige green H90 on the undersurfaces, around the fuselage band, the spinner and the bottom of the wheel doors.
 |
Underside masked up. |
The underside and band were masked up, followed by only a single coat of matt dark earth H29. For the green camouflage pattern I used an original drawing from Supermarine that is in the book Spitfire: The History by Morgan and Shacklady. I scaled the pattern to match the size of the kit, although I needed two different scales, one for the wings and one for the fuselage. You can never fully trust kits (especially from 1955) or drawings to always accurately represent the real thing! I would then place Tamiya tape along a wavy line on the printed drawing and mark out the line using a pencil. The tape would be removed and stuck to a clean flat surface (I used another piece of the drawing) and cut along the pencil mark using a sharp X-acto knife. The mask would then be placed on the model, using small pencil marks on the wing edges to guide placement. Surprisingly, it only took me about three hours to have the whole plane masked up. I then sprayed two coats of satin dark green H163 which apparently is a closer match to Dark Green then what Airfix usually recommends (H30). It would have been better if I could have used one coat, as there is now a distinct edge to the patterns.
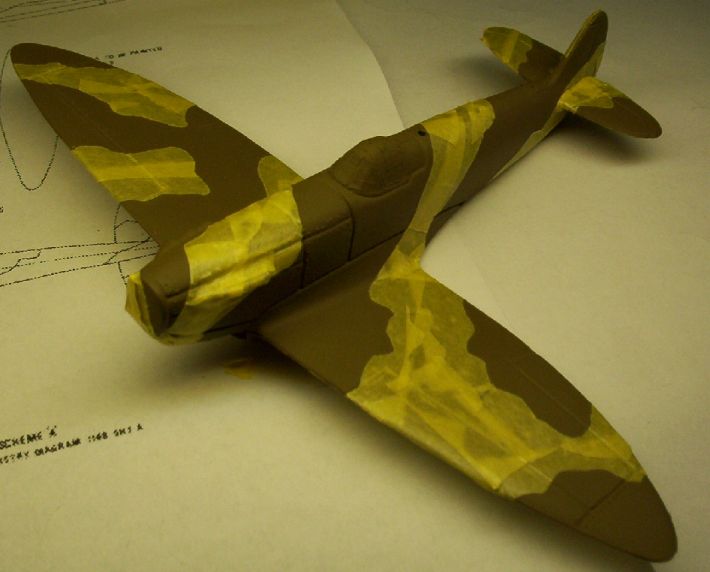 |
Camouflage masked up. |
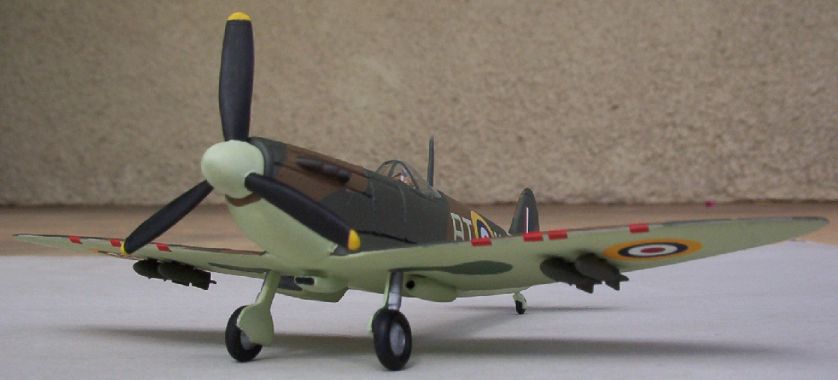
After removing the masking tape, small detail painting followed. The machine gun covers on the leading edge were painted red. The kit wings actually show a D wing, without any guns or cannons. The propeller tips were painted yellow, masked and then the propellers painted matt black. The engine exhausts were painted with a 50:50 mixture of gun metal H53 and bronze H171. The "wheel wells" were painted cockpit green H78. Each of the front wheels is one piece. The wheels were painted matt black H33 and the legs and hub painted aluminium H56. The inside of the doors was painted cockpit green. The rear wheel was painted matt black and the not entirely accurate wheel support painted Sky. The bombs were painted satin dark green.
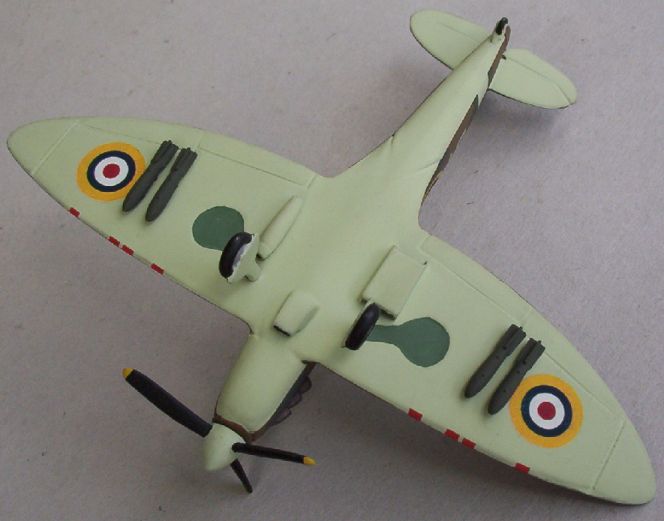 |
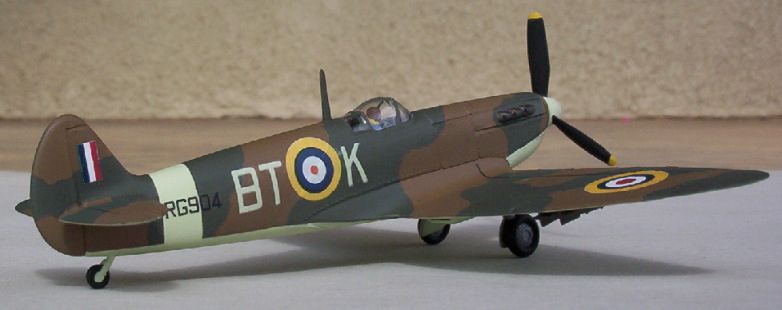
Spitfires only ever carried one bomb under each wing. The round oil cooler shows that this is a Mk.V. |
For the decals, I made up new roundels for the wings and flashes for the tail, as the ones provided with the anniversary kit are accurate for an early war Spitfire, but not what originally came with the kit. The new roundels are smaller and have inaccurate sizes for the yellow, blue, and white rings. You can download these markings here (you will need GSview to print this file). I had a bit of trouble sealing the ink-jet printed decals, this time spraying too much Microscale Liquid Decal Film. This caused a slight cracking appearance in the decals. For the squadron code and serial, I used the anniversary kit decals, but these aren't correct for a true BTK Spitfire. The code letters should be white instead of Sky, the roundel is not right, and the serial should be dark blue instead of black.
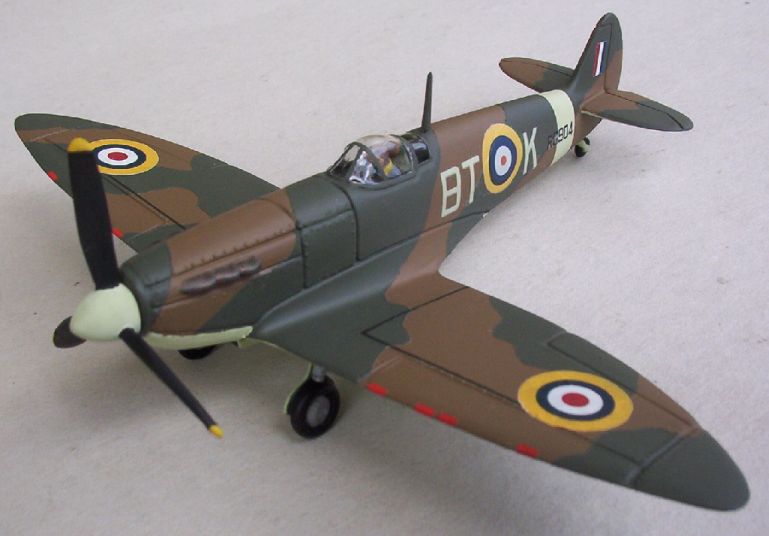 |
Note the "incorrect" roundels on the wings. |
I didn't spray a gloss coat, which resulted in some of the decals silvering in places. I also added the black lines to the wings using the black line that surrounds the anniversary decal sheet. The bombs were attached and the whole aircraft was then sprayed with Humbrol Matt Cote. The Matt Cote was super thick and needed a bit of diluting with white spirits. The wheels and antenna mast were attached, canopy masking removed, followed by touchups and popping on the propeller!
Conclusions
For the modeler who wants an accurate Spitfire, this kit is not for you. For someone who wants to build a piece of modeling history, which is Airfix's first aircraft kit from 50 years ago, and possibly the first ever 1/72 aircraft in polystyrene plastic, then you will have a lot of fun putting this together.
The model now sits in my new glass display cabinet and is getting a lot of favourable comments, even when I tell them that the kit is from 50 years ago!
 |
 |
 |
 |