The kit was listed as 1/72 scale in the Airfix catalogues, but the actual scale is smaller than that. Airfix supplied a standard 1/72 male 1960's jet jockey for the kit which is much too large compared to photos of the studio model. There are two sources of information on the scale of Angel Interceptor kits. The first is from "CENTURY 21" No.15, Winter 1993, Special Captain Scarlet Issue which states the length is 60 ft (18.3 m) and width is 35 ft (10.7 m). The Airfix kit is 183 mm long and 98 mm wide, making it 1/100 in length and 1/109 in width (or about 1/100).
The other source is TV Century 21 which states that the studio models are about 7 inches (178 mm) and 26 inches (660 mm) in length. It would appear that the Airfix kit is a copy of the smaller model as they are very similar in length. If we assume that the studio model was made at the standard scale of 1/24 (15.85 m in "reality") which is common for studio models, this makes the Airfix kit at about 1/87 scale (HO scale). My preference is to assume the "studio" scale of 1/87. The Airfix kit is too large for a "magazine" scale of 1/100 in my opinion, but too small for a scale of 1/72.
|
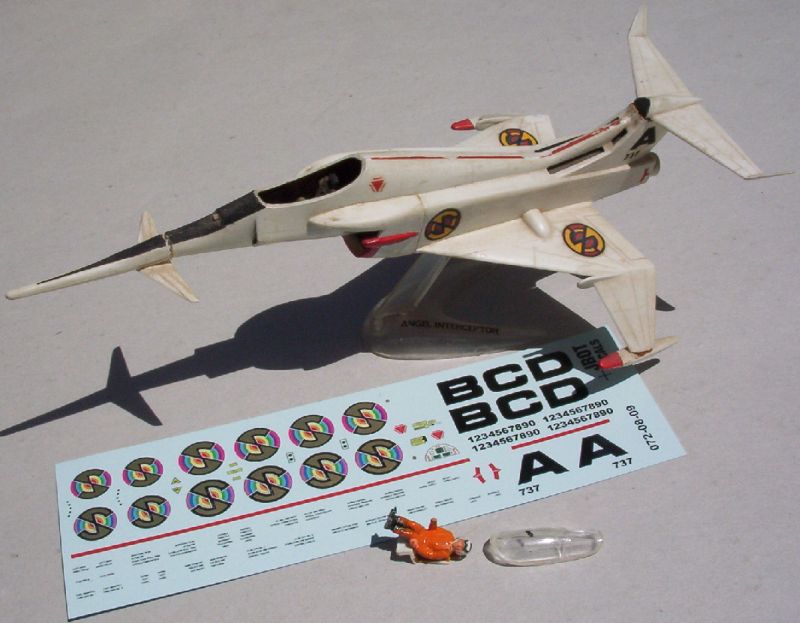
My old model before restoration, JBOT decals which I did not use, and the missing parts supplied by Mario Wens. |
In the 1970's I had built two kits of the Airfix Angel Interceptor. The first one was when I was in primary school and was unpainted, but with the nose gear down, as that's how I liked to build my aircraft kits (more parts you see :-). The second one was when I was in high school, and had ordered from BMW Models in England. This kit was partially painted. No putty was used. The nose gear was always breaking from my first kit, so I decided to build this kit gear up. The first kit got thrown out when I started university, but I kept my painted kits, which included my second Angel Interceptor.
Around 2001 I had taken out my old Angel Interceptor, which was in pretty bad shape, with many pieces having come off the model. I used some glue I found to put it together. This wasn't a good choice as the glue later turned brown! The pilot and canopy were also missing. In May 2004, Bruce Jones from the defunct Airfix forums pointed out that JBOT had made decals that were scaled for the Airfix Angel Interceptor. I ordered a set, with a restoration of my kit in mind, but I was missing the canopy and pilot. One year later, Mario Wens from the Airfix forums came to my rescue by providing the missing parts from an old built-up kit he had. With the parts and decals in hand, I set about restoring my kit, a skill I wanted to learn.
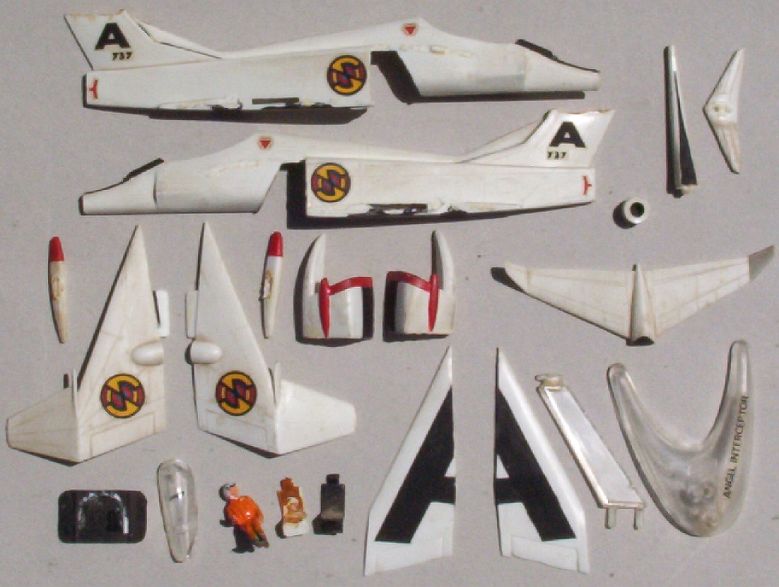 |
Parts after seperation. |
The next step was to spray oven cleaner into a bag and put the parts in. Gloves needed to be worn as the cleaner is caustic. After a soak overnight, the parts were washed under a running tap and scrubbed with an old toothbrush to remove any remaining paint. However, a lot of the paint stuck on, especially the "A" under the fuselage and other black areas. I resoaked the parts for week, but only small bits of paint were coming off at a time. I then tried brake fluid, but this was not very successful, and I did not like using it. It stunk, was messy and gave me a headache, compared to the nice lemony smell of the oven cleaner. After another week of over cleaner and lots of brushing, I was finally satisfied, although some paint still remained. I guess they made pretty strong paint in ye olden times! The oven cleaner also allowed the two skids to be taken apart, even though they were strongly glued together.
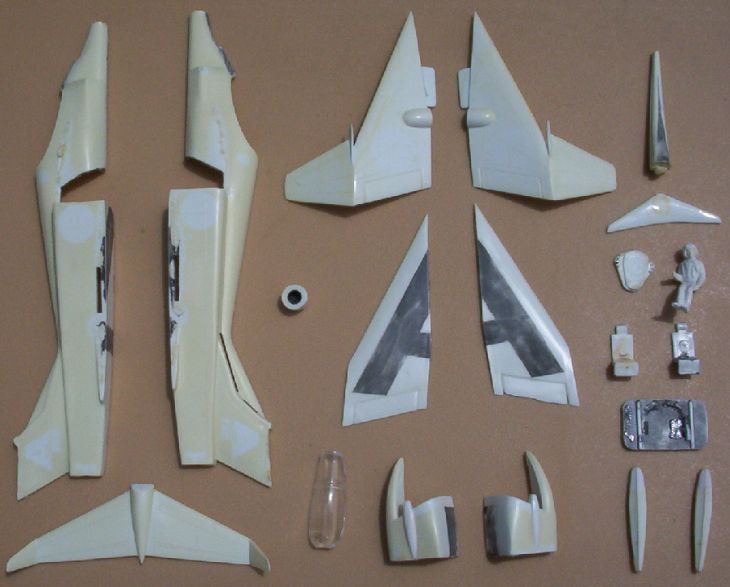 |
Parts after cleaning. The wing skids had been put back together. You can see where the exposed plastic had yellowed! |
I added a piece of plastic card at the back of the cockpit to fill in the gap. The interior was painted Humbrol 27 matt sea grey and the inaccurate seat gloss red. The instrument panel was painted satin black. The instrument panel also has the missile pods. One of the missile pods had broken off. This was fixed with a short piece of wire. I also had to modify this part a little so that it would fit in the fuselage properly.
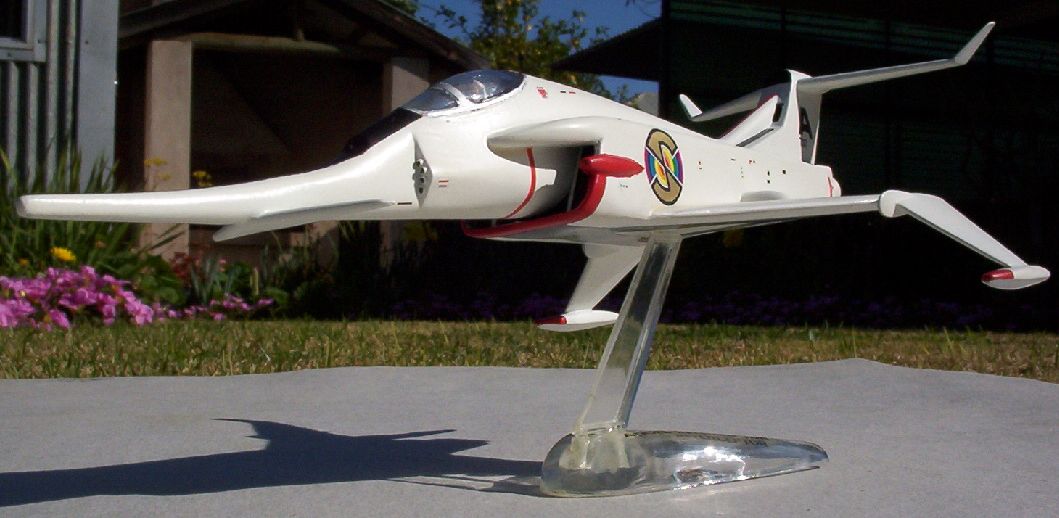
I then set about accurising the pilot. This involved some, err, delicate surgery to make the make the male pilot female. Bits were chopped off (ouch!) and other bits added using putty. The goggle on the helmet was removed and tiny sunglasses made from plastic card added. The bottom of the legs were smoothed down to replicate the long boots the Angels wore. Two shoulder bars (that light up when someone calls an Angel) were added using two small bits of plastic rod. Red shoulder harneses made from thin strips of plastic card and a release buckle made from thicker plastic card were added. The body was painted matt white and boots gloss white. Gold paint was used around the neck, cuffs, belt, top of boots and shoulder bars. The sides of the helmet are supposed to be clear, so I painted this area gloss black to reflect Japanese Angel pilot Harmony. At the front of the helmet I added a tiny spectrum roundal from the JBOT decals, the only decal I ended up using from that sheet.
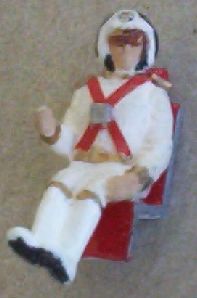 |
Angel pilot Harmony after surgey. |
The main parts were then assembled together without too much drama. To align the top and botton fuselage halves, I glued plastic card along the inside edges. The rear intakes and exhaust were painted matt black. A small amount of putty was used along most of the joins. As the lugs for the wing skids had broken off, I replaced these with a short pin. Unfortunately, one of the skids fell into the side of the lounge I was sitting on. I nearly had to take the lounge apart to find the skid! The skids were then superglued on for an extra strong join.
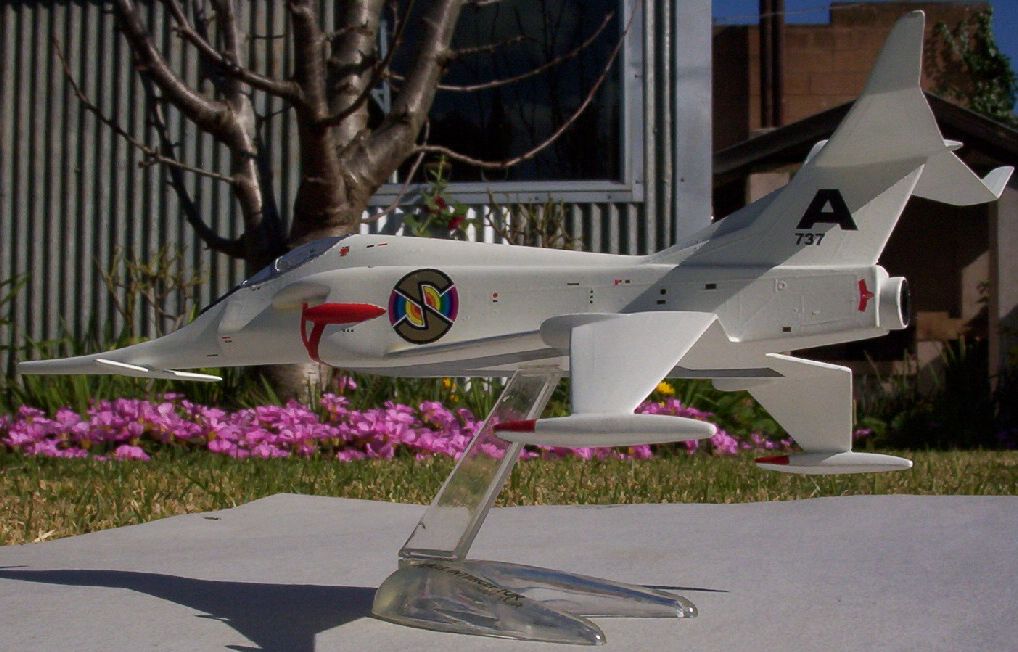
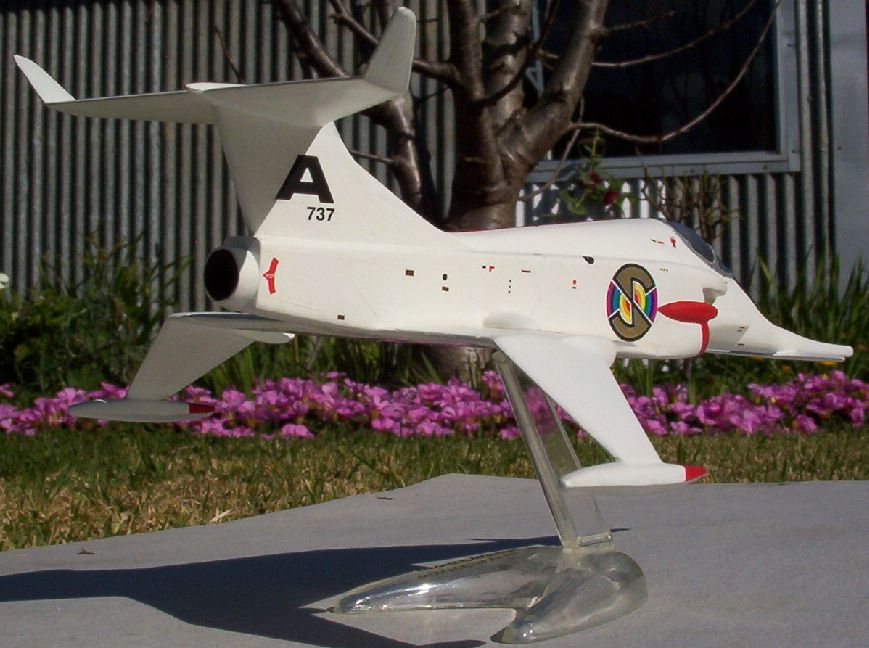
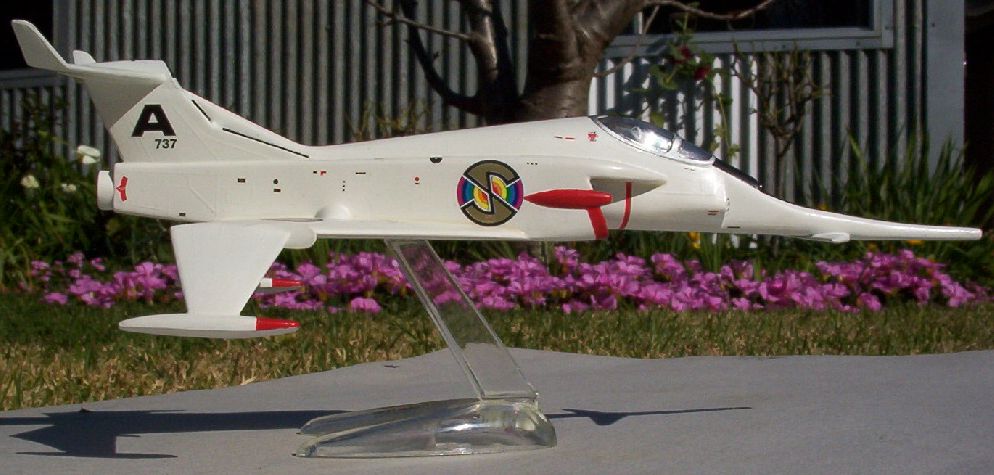
I also restored the stand, giving it a good polish and reinforcing the tab at the top of the stand. The original Airfix decal was left on, with only some touching up to do.
 |
Almost ready for the paint shop. |
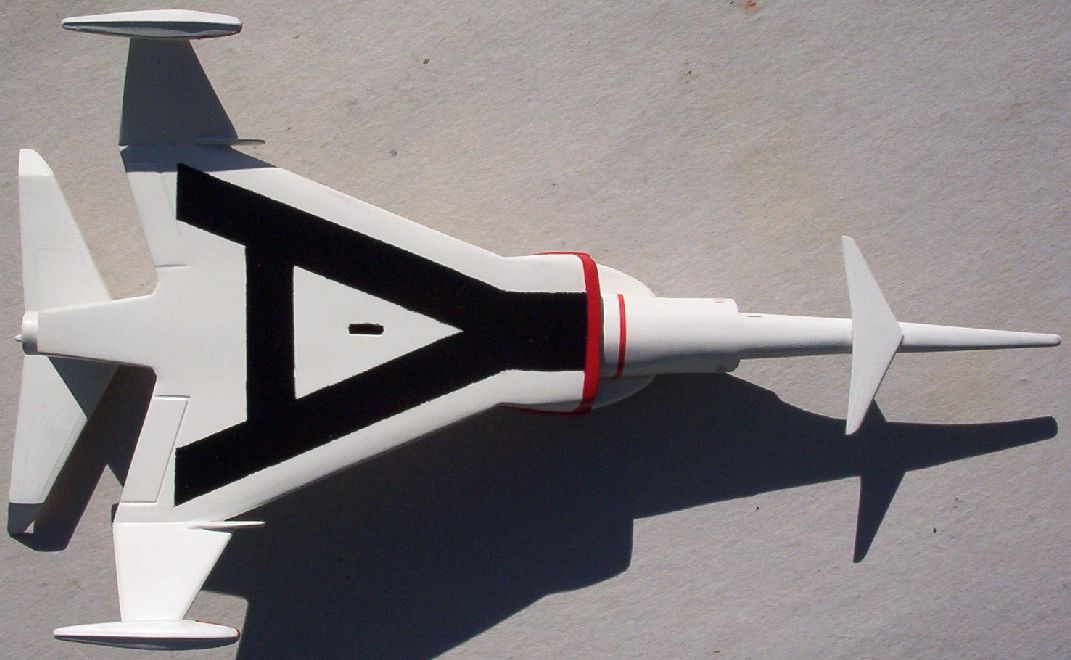
After painting the tips of the skids and forward intake gloss red, the large A under the fuselage and other black areas were masked up. Sanding had removed the lines for the A, so I had to follow the pattern on my old Airfix instructions. The JBOT decals provides the A, but this was much too large.
 |
The A masked up. | 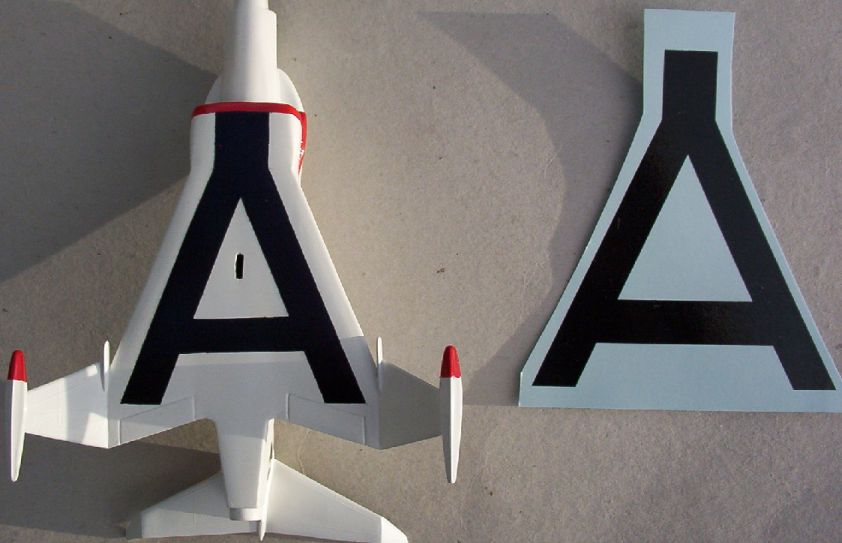 | Comparison to JBOT decal. |
I then applied the two 12 mm roundals on the wings and the A737 decals on the tail. However they were much too large! It seems that the 1/72 decals I had bought were indeed for a 1/72 Angel Interceptor, and not the smaller scale Airfix kit.
 |
1/72 JBOT decals are much too large. |
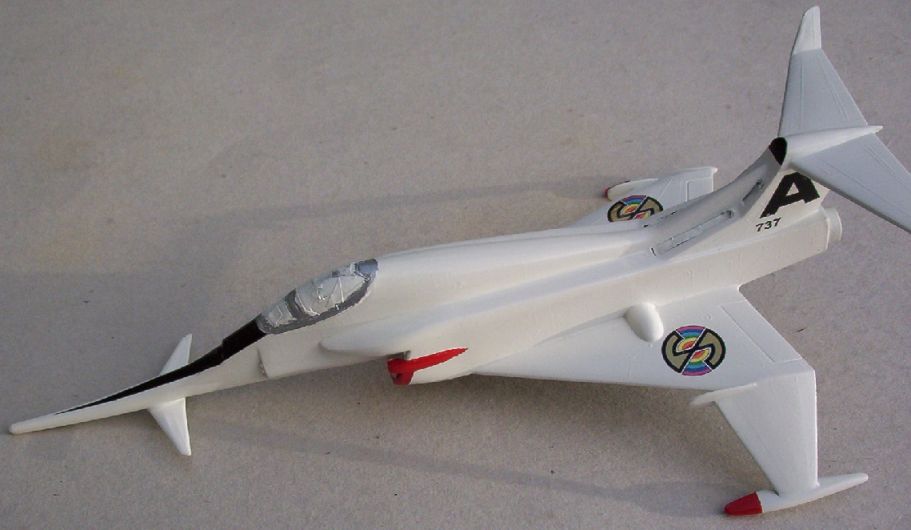
As I had my own ALPS printer which can print both white and gold, I decided to make my own decals. The stencils and other decals were easy to make, but the roundals were especially difficult due to the gold S overlaying the seven spectrum colours (red, orange, yellow, green, light blue, dark blue and purple) with white and black highlights. I eventually wrote a special program to calculate the positions, sizes and orientations of all the various elements that go up to make the roundal.
I had some gold foil ink, but I found that it wasn't sticking. After waiting several weeks I eventually got some metallic gold ink which has a satin finish. This also did not stick properly! After some experimentation, I found the problem to be the white undercoat I was using. I modified the undercoat page so that gold areas were not undercoated. This fixed the problem!
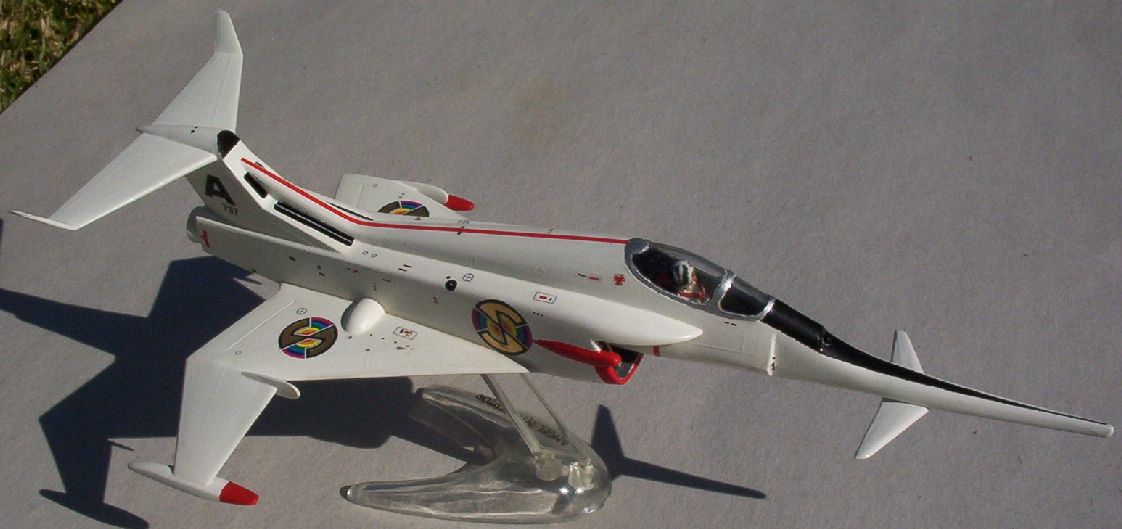
While I was preparing the decals, I discovered some excellent photos of the studio model at The Model Builders Reference Vault thanks to the Starship Modeler forums. These showed that all the stencils from the JBOT decals are completely fictitious. I then made up new stencils based on the photos. The photos are not large enough to make out what the stencils say, so I just used small rectangles as representations. You can download these decals here. I've also provided patterns for non-ALPS printers which don't print gold or white. The photos also showed that the bottom of the skids are all white. I sanded off the red areas off my skids and repainted them gloss white.
While trying out test roundals, I discovered that the sides of the Airfix kit are too high. The roundals had scaled out to 11 mm, but the side roundals were 1 mm too small if they were to touch the bottom and top of the sides, as they are supposed to. So, I had to scale these roundals to 12 mm. It turns out that JBOT provided four 12 mm and two 10.5 mm roundals. If I had put the 12 mm roundals on the side and the 10.5 mm roundals on the upper wings, I would not have had to go to all the trouble of making new roundals!
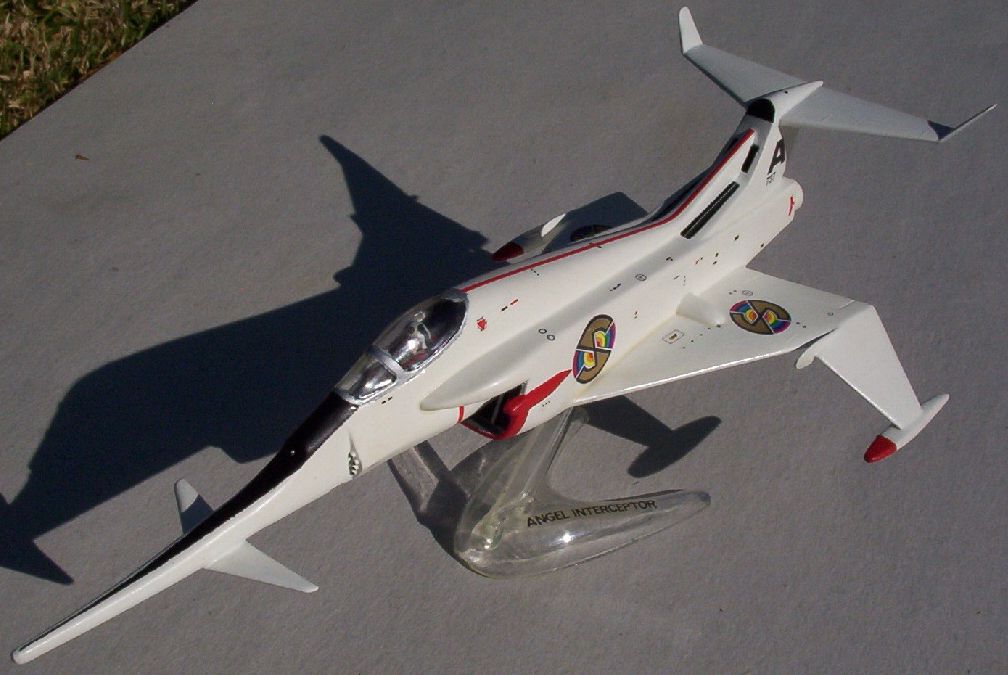
I did not place roundals under the wings as I wanted to follow the Airfix configuration. This configuration is also seen in some episodes, presumably of the smaller scale studio model. The rest of the decals were then put on. As they are very small, I would cut the decal out and put it next to where it is supposed to go. Using a brush dipped in water, I would soak the decal. After about 10 seconds, I could then move the decal into position with the brush. While applying the decals, the black anti-glare area had worn away, so this had to be remasked and painted.
A coat of Klear and then Humbrol satin clear were applied. Finally, after many months, the masking tape was removed from the canopy, intakes and exhaust. As the photos clearly showed the lower rear intakes were spit, I added a thin piece of plastic card into each intake. The sides of the white plastic card were painted matt black, with the edge left unpainted.
Spectrum Headquarters, "Angel Interceptor", Century 21, no. 15, Winter 1993.
The Model Builders Reference Vault, "Angel Fighter."
 |
 |
 |
 |
 |
 |
 |